Showing posts with label Valentine's Day. Show all posts

Thursday, January 29, 2026

#TGIFC561: Giving You a Big Smooch

Valentine's Day is coming up soon, and I decided I had better get to making the cards I need! This week's challenge at TGIF Challenges to use embossing powder gave me a starting point for my card.


I created this Valentine's Day card for my youngest daughter. She loves to give me a big, wet kiss every night at bedtime, so this sentiment and the cute bear from the Valentine Kisses stamp set are perfect for her! I paired them with the heart outline stamp from the Endless Love stamp set. This heart was embossed in gold multiple times on Watercolor Paper, then watercolored with Strawberry Slush and Bubble Bath ink. I love a good watercolor resist!
 

I've also embossed my sentiment. The card is finished off with a few extra touches of gold in the mat behind my background piece and the ribbon, as well as my favorite new embellishment - the Pearlized Faceted Circles.
 
Here is a full list of products used on this card:
Stamps: Endless Love, Valentine Kisses
Ink: Memento Black, Strawberry Slush, Versamark
Stampin' Blends Markers: Crumb Cake, Petal Pink
Paper: Strawberry Slush, Basic White, Gold Foil, Watercolor Paper
Embellishments: Pearlied Faceted Circles, Gold Striped 3/8" Mesh Ribbon
Tools: Basics Wow! Embossing Powder, Metallics Wow! Embossing Powder, Heat Tool, Water Painters, Stylish Shapes Dies, Valentine Kisses Dies, Stampin' Cut & Emboss Machine 
 

Happy Stamping!
Rachel  

Endless Love Card Class

Did you know? I do an online card class every week live on my Facebook business page at 12:00 PM Arizona time on Thursdays. It is free for anyone to watch, and if you can't make it live, you can watch the replay either on Facebook or on YouTube. 
 
This week's class features the Endless Love Bundle and other coordinating products from the Made With Love Suite Collection.
 

The class this week was pre-recorded, and you can watch it on YouTube here:
 

Want this week's card kit? Shop now through Tuesday, February 3. Spend more than $50 before tax & shipping (and after Stampin' Rewards), and I will send you a card kit to make the 3 cards pictured above. Through February 2, you'll also earn a $5 Bonus Days coupon for every $50 you spend! Please use this shopping link
 
These are some products you might want to consider adding to your order:
  • Endless Love Bundle
  • Made With Love Designer Series Paper (expected back in stock the week of February 9)
  • Bubble Bath 1/8" Faux Linen Ribbon
  • Loose Valentine's Assortment
  • Hearts of Love 3D Embossing Folder
  • Stylish Shapes Dies
  • Ink pads: Strawberry Slush, Bubble Bath 
I hope you enjoy this week's cards! Please let me know if I can help you place your order.
 
Happy Stamping!
Rachel 
 

Tuesday, January 23, 2024

Bee Mine Fun Fold Card Class

Welcome back! Today I have such a fun class to offer you featuring the Bee Mine Suite Collection. This is a fun fold card class where you'll make 5 cards using products from the Bee Mine Suite. 
 

This class is an online card class that can be done on your timeline. The class kit will include a PDF tutorial with pictures and instructions, and you will be sent a video with tips and tricks as well.
The class includes supplies to make 5 fun fold cards using the Bee Mine Suite Collection from Stampin' Up! Your card kit will include paper, ribbon, and embellishments that you'll use on your cards, with lots left over to create other projects!
You will need the Bee My Valentine Bundle to complete the cards exactly as shown in the tutorial, or you can substitute other products that you already own. If you choose to add on the bundle to your card kit, you will also get to choose a Level 1 Sale-a-bration reward!
You will need the following inks: Sweet Sorbet, Petal Pink, Daffodil Delight, Memento Black, and Lemon Lime Twist. You can add any of these on to your kit as well.
The deadline to sign up for this class is Thursday, February 1. Classes will ship to you on or before February 8.
If you sign up by Saturday, January 27, I'll include a bonus gift in your package!
The cost of this class is $33 plus shipping, or $15 for the tutorial only.
You can sign up for this class here.
 
Happy Stamping!
Rachel 

Tuesday, January 2, 2024

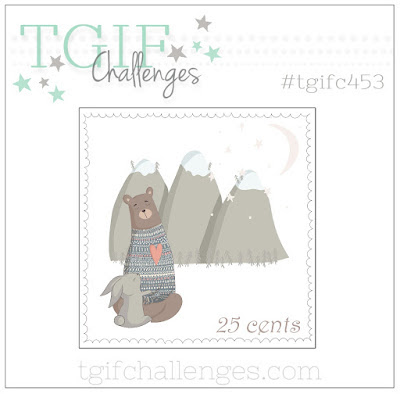
#TGIFC453: You Make My Heart Buzz

Happy New Year! My first card of 2024 was inspired by the challenge at TGIF Challenges this week.
 

I used the new Perennial Postage Dies and products from the Bee Mine Suite Collection for my cute square card.
 

I even remembered to stamp and decorate the inside!
 

The Pool Party ribbon is a Sale-a-bration item that is free with a $50 purchase starting on Thursday! It's a crinkled ribbon, and so pretty. I just love Pool Party, don't you?
 

Here is a full list of products used on this card:
Stamps: Bee My Valentine
Ink: Memento Black, Petal Pink
Paper: Sweet Sorbet, Basic White, Petal Pink, Bee Mine Designer Series Paper
Embellishments: Adhesive-Backed Hearts & Flowers, Pool Party 5/8" Crinkle Ribbon
Tools: 1 3/4" Circle Punch, Bee Builder Punch, Perennial Postage Dies, Stampin' Cut & Emboss Machine
Adhesives: Stampin' Seal+, Stampin' Dimensionals

Happy Stamping!
Rachel

Thursday, January 19, 2023

#TGIFC403: Happy Valentine's Day

A sketch challenge is always so much fun, and I'm playing along with TGIF Challenges and their sketch challenge this week.
 

This sketch is simple, and was easy to work with! I used the Country Floral Lane Suite and created a Valentine's Day card.
 

I used the Country Bouquet Punch to create a subtle, textured background. I punched the larger heart out of Crumb Cake cardstock a number of times and layered the hearts onto another piece of Crumb Cake cardstock. 


I also used the Country Bouquet stamp set, Country Floral Lane Designer Series Paper and Pastel Adhesive-Backed Sequins from this suite of products. Stampin' Up!'s coordination is the best, and makes it so easy to create beautiful projects!
 

Here is a full list of products used on this card:
Stamps: Country Bouquet
Ink: Blushing Bride, Sweet Sorbet
Paper: Crumb Cake, Basic White, Country Floral Lane DSP
Embellishments: 2022-2024 In Color Baker's Twine, Pastel Adhesive-Backed Sequins
Tools: Country Bouquet Punch, Stitched Rectangles Dies, Stampin' Cut & Emboss Machine
Adhesives: Stampin' Seal+, Stampin' Dimensionals, Mini Glue Dots, Multipurpose Liquid Glue

Happy Stamping!
Rachel

Thursday, January 12, 2023

January 2023 Monthly Card Club Sneak Peek

Welcome back! Today I have a sneak peek of this month's Card Club kit for you today, and I think the cards are just so much fun this month!
 

I used the Share a Milkshake Bundle, and these cards will be perfect for Valentine's Day or just sending a little bit of love to your friends and family. This month's kit will include a half package of the Country Gingham Designer Series Paper, a package of Opaque Adhesive-Backed Gems, a Wink of Stella glitter brush, and the cardstock bases and pieces to create 8 cards - 2 each of 4 designs. You'll also get a free gift included in your kit this month - a half package of the Sale-a-bration Favored Flowers Designer Series Paper!  
 

Here's a little more about how the club works: 
 

If you'd like this month's kit, sign up here by January 20.
 
Happy Stamping!
Rachel 

Wednesday, January 11, 2023

#TGIFC402: Be My Valentine

This week's challenge at TGIF Challenges is a color challenge. I'm not sure which I enjoy more - a color challenge or a sketch challenge - but this color challenge definitely includes colors that are right up my alley!
 

I decided to use the products that were already out in my crafting space: the Share a Milkshake Bundle, Country Gingham DSP, and the Fabulous Frames Dies. Here's what I came up with:
 

Now before you go thinking that's a burnt ice cream cone, have you ever tried the Oreo sugar cones? So yummy! That's what I was going for here. 
 

I stamped off on the scoops of ice cream and the little background hearts to create the lighter shades of Polished Pink. And isn't that heart tucked into the top scoop adorable?! I think that little spot to tuck things in is my favorite feature of this die set!
 

Here is a full list of products used on this card:
Stamps: Share a Milkshake
Ink: Early Espresso, Polished Pink
Paper: Thick Basic White, Basic White, Early Espresso, Polished Pink, Country Gingham DSP
Embellishments: Baker's Twine Essentials Pack, 2021-2023 In Color Opal Rounds
Tools: Share a Milkshake Dies, Stylish Shapes Dies, Fabulous Frames Dies, Stampin' Cut & Emboss Machine
Adhesives: Stampin' Seal+, Stampin' Dimensionals, Mini Glue Dots, Multipurpose Liquid Glue
 

Happy Stamping!
Rachel

Wednesday, January 4, 2023

Adorable Owls Card Class

Are you ready to see my first card class of 2023?! This class includes over $50 in product AND a stamp set, plus supplies to make 10 cards - 2 each of 5 designs.
 

Here are more details:
In this class through the mail, you'll make 10 cards - 2 each of 5 designs, using the Adorable Owls stamp set. This class is $68 and includes the Adorable Owls stamp set, a half package of Country Floral Lane Designer Series Paper, the Real Red & Burlap Ribbon Combo Pack, a package of Iridescent Pastel Gems, a package of Textured Shimmer Paper, and two sets of Stampin' Blends Markers - your choice of colors, plus the cardstock pieces cut and ready for you to assemble your cards, envelopes, and a PDF tutorial.
The Stampin' Blends Markers needed to color the images exactly as shown in the PDF are Crumb Cake, Pumpkin Pie, Mint Macaron, Balmy Blue, and Sweet Sorbet. You will choose 2 colors that are included in your class, but you may add on additional colors for $9 each. (Each color includes a set of 2 markers in a light and dark shade.)
Other products you will need to complete your cards: Memento Black ink and adhesives. You will have the option to add these items onto your kit as well.
Shipping is $10, or you can pick your kit up if you are local to Gilbert, AZ.
The PDF tutorial may be purchased for $15. If you choose that option, it will be emailed to you on January 23.
The deadline to sign up for this class is Friday, January 13, and the card kits will ship out to you on or before January 23.

Happy Stamping!
Rachel

Thursday, January 27, 2022

#GDP327: Valentine's Day

So excited to play along with the Global Design Project challenge again this week - it's a Valentine's Day theme this week, and I am loving the Valentine's products this year!
 

I am featuring the Catching Butterflies stamp set on Facebook this week, so I used that stamp set, and it's so sweet and fun.


Lots of little details to note on this card: the girl's skin is colored with our new Natural Tones Blends Markers! These will be available on Tuesday, or you can add them to a starter kit right now. Her dress is pieced together with the Sweet Talk DSP. I stamped her on Basic White cardstock and colored her in, then stamped her on the DSP as well. I fussy cut her dress and glued it onto my colored image. This is such a fun way to add patterns to your stamped images! Have you tried paper piecing before?
 

And one more tip: the Light Pool Party Stampin' Blends Marker is perfect for adding a little bit of shadow and dimension. If you look carefully, I used it on the net.
 

Here is a full list of the products I used on this card:
Stamps: Catching Butterflies
Ink: Memento Black, Blushing Bride, Stampin' Blends Markers: Light Pool Party, Soft Suede, Natural Tones Blends (SU800)
Paper: Thick Basic White, Basic White, Blushing Bride, Highland Heather, Sweet Talk Designer Series Paper, Shimmery White Cardstock
Embellishments: Baker's Twine Essentials Pack
Tools: Versamark, White Embossing Powder, Heat Tool, Water Painters, Scalloped Contours Dies, Sweet Hearts Dies, Stampin' Cut & Emboss Machine
Adhesives: Stampin' Seal+, Stampin' Dimensionals, Mini Glue Dots, Multipurpose Liquid Glue
 
Happy Stamping!
Rachel  

Wednesday, January 19, 2022

#GDP326: Sketch Challenge for Valentine's Day

 I found time to play along with the Global Design Project challenge again this week. (Three weeks in a row might be a record for me!) This week it was a sketch challenge, and I combined this with a color challenge going on in my team group right now. I love combining these two types of challenges!


Since I'm featuring the Sweet Talk Suite of products on Facebook this week, I decided to go with those products for my card. This card came together pretty quickly since the layout, the colors, and the products were already chosen!
 

The only item outside of the suite that I added was the Polished Dots. The Petal Pink fit in perfectly with the color scheme, and this embellishment is a little more subtle than the Iridescent Rhinestones that are a part of the Sweet Talk Suite. 
 

Here is a full list of products that I used on this card:
Stamps: Sweet Conversations
Ink: Flirty Flamingo, Petal Pink
Paper: Crumb Cake, Flirty Flamingo, Basic White
Embellishments: Polished Dots
Tools: Sweet Hearts Dies, Gingham Embossing Folder, Stampin' Cut & Emboss Machine
Adhesives: Stampin' Seal+, Stampin' Dimensionals, Mini Glue Dots
 
Happy Stamping!
Rachel 

Wednesday, January 5, 2022

Awesome Otters Card Class

 
Hello! I have a fun new class to offer you this month, and it features the Sale-a-bration stamp set "Awesome Otters", plus the adorable Sweet Talk Designer Series Paper! 
 

This card class through the mail is packed full of cute and fun cards you can use for Valentine's Day and all through the year. The class includes over $50 of product plus the Awesome Otters stamp set, as well as supplies to make 10 cards - 2 each of 5 designs, envelopes, and a tutorial with instructions.
Based on product availability, you will receive a half package of the Sweet Talk Designer Series Paper, a package of Iridescent Rhinestones, a roll of Highland Heather Ribbon, a roll of Real Red Faux Linen Ribbon, a Wink of Stella, a pack of Crumb Cake Stampin' Blends Markers, a pack of Pool Party Stampin' Blends Markers, and the Awesome Otters stamp set. If one or more of these products goes out of stock, a similar product will be substituted.
You will need to provide your own inks and adhesives. I recommend Stampin' Seal+, Stampin' Dimensionals, Multipurpose Liquid Glue, and Mini Glue Dots. Besides the Stampin' Blends Markers included in your class kit, you will also need Memento Black ink, Highland Heather ink, Highland Heather Stampin' Blends Markers, Granny Apple Green Stampin' Blends Markers, and Petal Pink Stampin' Blends Markers. You can add any of these items on to your class kit at the catalog cost (no additional tax or shipping), or use what you already own.
This class is $68. Shipping is $9, or you can pick up your card kit if you are local to Gilbert, AZ. The deadline to sign up for this class is Tuesday, January 18. Card kits will ship to you by January 28.
If you would like to purchase the tutorial only, the cost is $15. Your tutorial will be emailed to you when the card kits ship on or before January 28.
You can sign up for this class here.
 
Happy Stamping!
Rachel  

Monday, February 15, 2021

Sending Hearts: More Alternative Projects

It's after Valentine's Day, I know. But I wanted to share the rest of the projects I made with January's Paper Pumpkin kit, Sending Hearts, and the Little Love Boxes Add-On. And let's be honest, sometimes things get done last minute in my world, and I ran out of time to share these last week. 

First up, this is what I did for my kids' teachers. I bought them each a box of chocolates, and then fancied up the top of the box. I only snapped a photo of one of them - but you'll get the idea.
 

I used the stamp set from the Sending Hearts kit to stamp the XOXO on the background. The heart stamp is from the Snailed It stamp set. I used the Many Hearts Dies, the Playful Alphabet Dies, and the Snail Dies to cut that cute snail out of the Snail Mail DSP. The ribbon is leftover from the August-December Mini Catalog, but the red worked perfectly for Valentine's Day! The box was finished off with some of the heart embellishments from the Sending Hearts kit.

Next up, I made matchbox holders for the valentines my kids handed out to their friends. We picked up a large box of heart-shaped fruit snacks at Aldi (side note: I am super excited that we just got this store here in Arizona!) for them to hand out.
 

I used the little die-cut snails from the Little Love Boxes Add-On to decorate, and a stamp from the kit for the sentiment. So cute! I punched a heart out of the Snail Mail DSP with the Heart Punch Pack, and the stitched white piece is from the Snail Dies. We made Petal Pink holders for the girls and Pool Party holders for the boys. When I ran out of snail die-cuts, I used the stamp from the kit to stamp some more and colored with Stampin' Blends Markers, then fussy cut. I used up that Real Red Sheer Ribbon, then used up another red ribbon from the holidays, and finally finished up a few with the current Pool Party Sheer Ribbon. Again, I didn't get photos of everything, but here are a few more.


Finally, I used some of the Little Love Boxes as treat holders for the rest of the teachers at my kids' school. We put two Reese's hearts or two Hershey's strawberry creme hearts inside of each one.
 

I used Purple Posy cardstock for a belly band and the scalloped heart in the background. My first plan was to use Magenta Madness for the whole thing, but that has been my favorite color recently, and I was all out of Magenta Madness cardstock! The stamp is from the Heartfelt stamp set - my favorite set for Valentine's Day this year. 


Even though Valentine's Day has passed, I hope you enjoyed these projects! I'll have one more card to share with you this week that I made my husband for Valentine's Day, so make sure to check back!

Happy Stamping!
Rachel

Friday, February 5, 2021

January 2021 Paper Pumpkin: Sending Hearts

One of my goals this year is to get my Paper Pumpkin kits put together every month. I so love getting these boxes in the mail every month, but after my second son was born (over five YEARS ago!), I got a little behind. I've put them together here and there, but I have a pile of boxes. Some half done, some brand new, some fully done with the cards still sitting in the box. So this year, I am resolving to put the kits together shortly after I get them, share the projects with you here, and then send the cards or gift the gifts to people I love.

January's kit was perfect for Valentine's Day, and honestly the cards could be sent to anyone you love anytime, just to show them you care. I put two together the way they were intended, and then had a little bit of fun with the rest. I also ordered the add-on, which included die cut snails and labels, plus 24 little boxes. I was thinking of using the boxes for my kids' classroom valentines, but I'm a few short, so I'm coming up with another plan for those. Stay tuned! Here are the cards I created:
 
These cards were put together as intended. So cute! 
 

For this one, I used three of the snail die-cuts from the add-on. I cut a piece off of one of the card bases, and added in some Poppy Parade and Basic White cardstock.
 
 
This next one is pretty similar to the original, but I used Petal Pink and Memento Black inks instead of Poppy Parade. I also switched the card bases around and used the Petal Pink base instead of the Poppy Parade.
 

I think this is my favorite of all of the cards! I added in some Poppy Parade and Basic White cardstock again. I used another piece from the Poppy Parade card base in the kit, stamped along the bottom of the card, trimmed one of the black scalloped pieces to fit, and added a few Matte Black Dots instead of using the Petal Pink embellishments that were included in the kit.
 

For this card, I used another snail die-cut from the add-on. Instead of stamping the large heart image, I placed the snail inside the gold heart and stamped the sentiment there as well. Simple and cute!
 

Next, I added a snail die-cut on the mailbox piece. I left the ribbon off and switched out the sentiment on the label for the large love die-cut. 
 

For this one, I switched out the Poppy Parade ink for Petal Pink and Memento Black. Instead of using the Petal Pink embellishments, I used a few Matte Black Dots.
 

For my final card, I once again used a die-cut snail from the add-on. I stamped the sentiments right on the mailbox piece. I wrapped the ribbon around and used one of the smaller black scalloped pieces on the bottom instead of the side.
 

I hope you've enjoyed these alternative cards using January's Paper Pumpkin kit! 
 

If you're interested in subscribing to Paper Pumpkin, you can read more about it here. Here's a little peek at February's kit:
 

You'll need to subscribe by February 10 to get the kit pictured above.

Happy Stamping!
Rachel