Friday, May 28, 2021

Have a Wild Summer!

As promised, today I am sharing the gifts I made for the teachers at school to thank them for a good year. I used the Wild Cats stamp set and some clever masking to come up with the tags for these cute gift bags!
 

The template for this gift bag comes from Ronda Wade. It's a pretty easy design that can be used with any patterned paper! 
 
You'll need a piece of cardstock measuring 3 1/2" x 3 1/2". Score each side at 1/2". Cut up one score line on each side to create tabs, and then use a strong adhesive like Stampin' Seal+ or Tear & Tape on the tabs to create the bottom of the bag. It will look like the bottom of a small box.


Next, cut a piece of Designer Series paper 6" x 12". Put Stampin' Seal+ or Tear & Tape along one of the short sides and one of the long sides. The long side will wrap around the bottom of your cardstock "box". Go slow so that you don't get any "bubbles" in your paper. When you've wrapped the paper all the way around, there will be some left that overlaps. This is the short side that you already put adhesive on. Let it fall into place and press to hold the adhesive. 


Pinch the top sides of your bag together, and punch a circle with a circle punch in the size you'd like. I used a 3/4" Circle Punch. This is where you will tie your ribbon through.


Finally, design a tag for the front of your bag. These bags are perfect for any occasion - birthday, Christmas, a little appreciation gift... In these we put some chocolates and a Sonic gift card.
 

One more note about my stamping - I did use a retired alphabet set - Skinny Mini Alphabet - to spell 'SUMMER'. You could also use the Playful Alphabet Dies. I found that the die-cut letters were just a little bit too wide for my tag, and I needed something quick and easy because I was putting these together last minute! The sentiment in the stamp set says "Have a wild birthday". I masked off the "birthday" before inking the stamp. Same with the "you're the beast" - I masked off the thanks before inking (although it was appropriate in this instance, I liked how the sentiments flowed better without it). I used the Tailor Made Tags Dies to make a little tag for each teacher's name.
 

I hope you enjoyed this project! I just love the funny play on words, and the teachers loved these too! Here is a full list of supplies I used:

Stamps: Wild Cats, Skinny Mini Alphabet (retired)
Ink: Crushed Curry, Memento Black
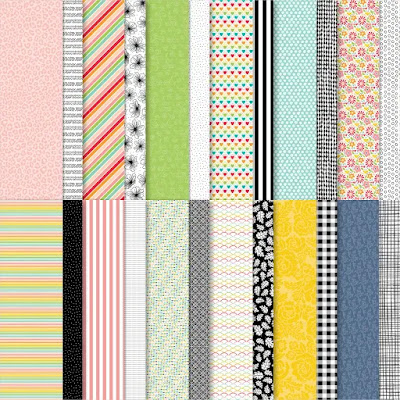
Paper: Blushing Bride, Evening Evergreen, Basic White, Pattern Party DSP, In the Wild DSP
Embellishments: Blushing Bride Metallic Ribbon, Evening Evergreen Open Weave Ribbon
Tools: Hippo & Friends Dies, Tailor Made Tags Dies, Stampin' Cut & Emboss Machine, 3/4" Circle Punch (retired)
Adhesives: Stampin' Seal+, Stampin' Dimensionals

Happy Stamping!
Rachel

Wednesday, May 26, 2021

A Day in the Life...


Today's post is a little bit different. I always think it's fun when bloggers give you a peek into their daily lives and I thought - why not do that here? I hope it gives you some insight into how I run my Stampin' Up! business and perhaps you'll learn a little bit more about me. I give you permission - be a stalker today, haha! 

Yesterday I "journaled" my different activities - so here you go!

5:45 AM: This is the time I set my alarm for every day. Today I had it set a bit earlier because we had to get out the door for kids' dentist appointments. Unfortunately I was moving a little slowly this morning because I was up with my 2-year-old from 2:30-3:30 AM.
 
I did a quick check of my Facebook notifications, email, and Stampin' Up! site as I made my morning caffeinated beverage. (I'm not a coffee drinker, but I still like my caffeine! I drink the Walmart brand Pomegranate Lemonade every morning - it's like a Crystal Light packet.)

6:30 AM: After showering and getting ready, I had about 2 minutes to hop on the computer and start this post. That was all I got before it was breakfast time and working on getting everyone else ready to get out the door. 

7:15 AM: I headed out to take the kids to the dentist, and then drop the older two off at school.

9:00 AM: Back home, and the younger two kids are settled in playing outside. I took a few minutes to register for BackStage, which is the Stampin' Up! leaders' event that will take place in August. It's virtual again this year, and my second opportunity to attend. I LOVED my first one last year! Registration opened this morning, so I had to sign up right away!

9:15 AM: The box with my club orders arrived, so I unloaded and sorted it.

9:30 AM: In between washing mud off of kids.... I scheduled a Facebook post.
Then the kids moved to playing inside, and I cleaned up in the kitchen.
 
10:15 AM: I scheduled another Facebook post, and then took the kids to the library to pick up and drop off some books and movies. Of course we had to read a few when we got home!
 
11:00 AM: Lunchtime. We ate leftovers, which is pretty typical.
 
11:30 AM: As you may have guessed from my blog name, "naptime" is when I do a lot of my stamping. None of my kids nap any more, but we still have a quiet time/rest time after lunch, and that's a consistent time when I try to get stamping stuff done. 

Today I typed up the tutorial for this month's Simple Card Class and sent it to my team members via email and our Facebook group. Then I worked on teacher gifts - the last day of school is tomorrow. Watch for a blog post on those later this week!
 
1:00 PM: One of my team members/customers stopped by to pick up a card packet from my class on Saturday, so I chatted with her for a few minutes.

1:15 PM: Rest time is over. I read books to the kids again for a few minutes, then they went to play and I went back to working on the teacher gifts.

1:30 PM: My upline goes live in our Facebook group every Tuesday, and I caught her live today! She showed us all of the stuff she got on the incentive trip - so much fun!
 
While I watched, the kids played a game and I kept working on teacher gifts.
 
2:30 PM: We left to run a few errands and pick the older two up from school.
 
3:45 PM: Time to get dinner in the oven. We're having porcupine meatballs and mashed potatoes. This is a recipe from my grandma - love making her recipes because it brings back good memories of her!
 
4:30 PM: Dinner is in the oven. My husband took a few of the kids to the store, and I am putting in an order for a customer, and scheduling a post or two for Facebook tomorrow. Then it's back to finishing up dinner.
 
5:15 PM: Dinnertime. Everyone eats without too many complaints.

5:45 PM: We all get changed and ready to go to the graduation and closing service at my kids' school.

6:15 PM: Out the door again. We attended the service and a reception for the eighth grade graduates. Then we visited for far too long with other parents. It was a late night for the kids, but fun!

9:00 PM: Bedtime for the kids went pretty quickly tonight, since it was an hour and a half past their normal bedtime!

After the kids were in bed, we watched a little TV before heading to sleep ourselves. Diners, Drive-ins and Dives is our current choice.

So there you have it. Yesterday was a pretty typical day although perhaps a little busier than normal. This is how I work my business - it is interspersed throughout the day and I work for a minute here and there when I can. It drives me CRAZY some days, and it's a constant battle to find the right balance between my business and my family. I love them both! 

Make sure you come back tomorrow to see how those gifts for the teachers turned out, and thanks for reading today!

Happy Stamping!
Rachel


Thursday, May 20, 2021

Join+: The Best Deal in the Catalog!

Today I'm taking a break from sharing a project with you, and instead I want to share a little bit about a promotion that Stampin' Up! is offering this month. It's called Join+, and if you're looking for a good deal, this is it!
 

Here are a few details about this special:
  • The Stampin' Up! starter kit costs $99 + tax. You get to pick $155 of product - and you can choose whatever you want! That's right - that's $56 for FREE!
  • Shipping is free on the starter kit. Which means that if you were planning to place an order of about $100 anyways, you would actually save money by purchasing the starter kit, and you would get more. It's kind of a no-brainer, right?
  • Your starter kit will also include a free past Paper Pumpkin kit and catalogs.
  • You will get a 20% discount on your purchases through at least October.
  • You'll get to see and purchase from the upcoming Holiday Catalog and second Sale-a-bration brochure before anyone else - and at a discount!
  • You'll get to be a part of a fun group of stampers, and join in our team creative and business challenges for prizes.
  • You'll receive all of my class tutorials for free as a member of my team.
I did a short video on my Facebook page the other day to answer some frequently asked questions about the starter kit. If you'd like, you can view the video here:
 

For this month only, you get to choose $155 of product for your starter kit. On June 1, it will go back to $125. If you'd like to take advantage of this deal, you can purchase your starter kit here. Please let me know if you have additional questions, or would like to chat about the starter kit.
 
Happy Stamping!
Rachel 

Tuesday, May 18, 2021

Wishing You Happiness

Today I am sharing a card with you that I made for a swap. It's a lot of fun to participate in a swap! I sent 20 of this card, and received 20 different cards back. Demonstrators often organize these swaps at the beginning of a new catalog so that we can get a variety of samples, some even using products that we might not own. It's always an exciting day when the returned swaps arrive in the mail! Here's what I created:
 

This card started with that heart-patterned piece of Designer Series Paper. It is from the Pattern Party stack of paper, which is a host exclusive item in this year's catalog. It's my favorite pattern, maybe even out of all the papers in the catalog! I also used the Scalloped Contours Dies to create the scalloped edge - isn't that a fun way to show off the paper and make the inside of the card a little fancier?!
 

The Scalloped Contours Dies were also used to cut the Bermuda Bay label for the front of the card. The sentiment comes from the Pansy Patch stamp set, and it is stamped on a white label cut with the Label Me Lovely Punch. White twine from the Baker's Twine Essentials Pack and a few Opal Rounds finish off the card. 
 

I hope you like this card filled with a bunch of my favorite things! Here is a full list of supplies:
Stamps: Pansy Patch
Ink: Bermuda Bay
Paper: Thick Basic White, Basic White, Bermuda Bay, Real Red, Pattern Party Designer Series Paper
Embellishments: Opal Rounds, Baker's Twine Essentials Pack
Tools: Heart Punch Pack, Label Me Lovely Punch, Scalloped Contours Dies, Stampin' Cut & Emboss Machine
Adhesives: Stampin' Seal+, Stampin' Dimensionals, Mini Glue Dots
 
Happy Stamping!
Rachel  

Thursday, May 6, 2021

May Card Club Sneak Peek

 
This month's card club kit will feature the Hand-Penned suite, with beautiful soft colors and watercolor designs!
 

Here are a few more details about the club:
 

To get this month's kit, sign up by May 20. You can read more about the club and sign up here
 
Happy Stamping!
Rachel 

Tuesday, May 4, 2021

2021-2022 Annual Catalog Top Ten

It's new catalog day, and I thought it would be fun to share my top ten favorite products with you! This was a hard choice - there are SO many things that I love. But here are just a few:

1) The new 2021-2023 In Colors
 

New colors are always at the top of my list, and this year's colors did not disappoint! Polished Pink is my current favorite. How about you?

2) Pattern Party Designer Series Paper
 

This is a host item, which means you can only purchase it with host rewards. Place your own order of at least $150, or host a party with sales of that amount and you can use your host rewards to purchase this fun paper! It is a HUGE stack, with fun colors and patterns on one side, and black and white patterns on the other. I can't remember ever loving another host exclusive item as much as this one!

3) Give it a Whirl Dies
 

You might have missed these on your first glance through the catalog. They aren't bundled with a stamp set, which makes them easy to miss, although you can see them pictured with the Stellar Birthday stamp set on p. 57 of the catalog. These dies can help you create fun spinning cards, but look at all of the shapes you get too! Love it!

4) Ombre Specialty Paper
 

This paper was part of our demonstrator pre-order, and while it doesn't look too special in the picture, it sure is in person! It's sparkly and reminds me of our old glimmer paper. Plus the colors are gorgeous!

5) Color & Contour Bundle
 

I will admit, I passed over this one on my first pre-order. However, I added it to my second order during the pre-order period because those dies caught my eye. They're great for layering, and will be one of my new go-to's for dies. And after playing with the stamp set a little bit, it's great too!

6) You're a Peach Suite
 

I couldn't choose just one part of this suite - I love the paper, the stamps, everything! 

7) Biggest Wish stamp set
 

I love the font, and the different options for sentiments. Plus, you can pair it with absolutely ANYTHING!

8) Pansy Petals Suite
 

Again, I couldn't choose just one part of this suite. My favorite thing about it is that the dies cut out images in the Designer Series Paper. This makes for quick, easy, and beautiful cards! The stamp set has a variety of sentiments too, which can stretch beyond the pansies.

9) Checks & Dots Embossing Folders


Embossing folders are not the first thing I notice in a new catalog, but there's some good ones this year. I love the polka dots!

10) Baker's Twine Essentials Pack
 

If you know me, you know how sad I was when white Baker's Twine retired a year or two ago. I'm so glad it's back in this package, along with 4 other neutral colors!

There you have it. My top ten picks - for now. Comment and let me know if any of these are on your list! 

You can shop the new catalog now.
If you don't have a paper copy, you can view the catalog here.
Orders over $50 will receive a free gift from me! Please use host code NSZQT4H6 if your order is less than $150. If your order is over $150, you'll also earn host rewards. Spend more than $250, and you'll get a BONUS $25 in host rewards!
OR, choose the starter kit for $99 and pick out $155 of product. That's $56 for free! Choose this option here.
 
Happy Stamping!
Rachel 

Saturday, May 1, 2021

May Christmas Card Club Sneak Peek

This month's Christmas Card Club features the brand new Ombre Specialty Paper. It's sparkly and SO pretty! 
 
 
Here are some details about the club:
 

If you'd like to sign up, you can do that here. Make sure to sign up by May 15 to get the cards pictured above.
 
Happy Stamping!
Rachel